When items are added to an agreement they are automatically allocated to the default placement for that site. This is normally called 'Default Placement'. If you like to be more specific you can create new placements and allocate all or part off your the items to them.
The new business items tab is split into three sections:
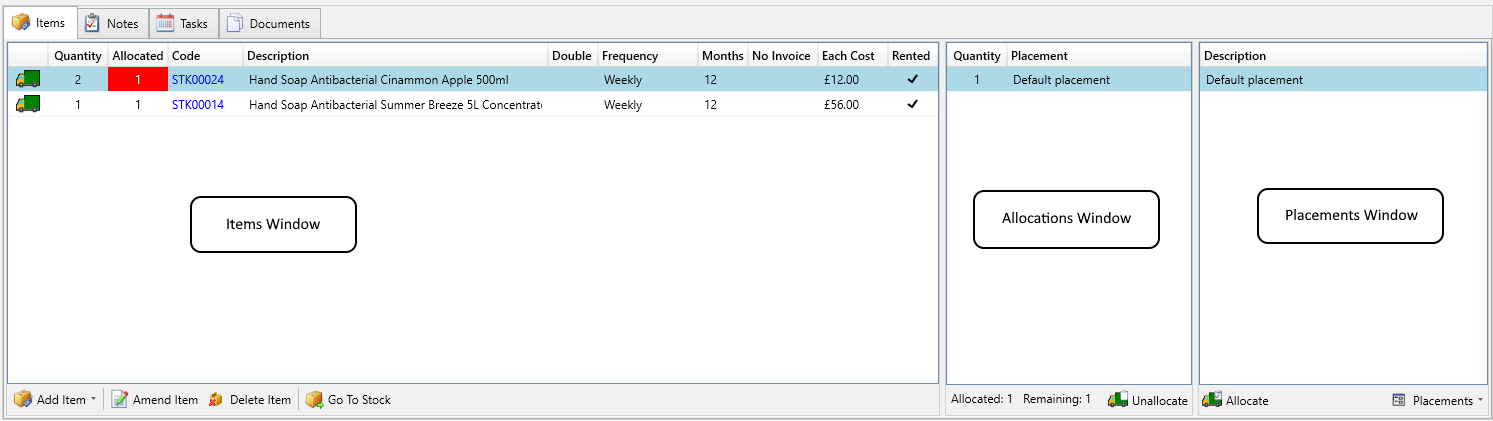
| Section | Description |
| Items Window | All items on this new business agreement, showing the quantity and the allocated quantity. This should always match. |
| Allocations Window | Placement allocation details for the selected item |
| Placements Window | A list of all the placements for this site |
In the items grid observe the Quantity and Allocated columns. By default these should match. The Allocated column is showing you how many of the quantity have been allocated to a placment. If for any reason these don't macth the offending items allocated column will be highlighted in red as demonstrated in the below diagrams.
Fully allocated item
Here for both item the quantity and allocated quantity match, meaning all of the items are allocated to a placement

Fully Unallocated item
Here the first item has a '0' in the Allocated column meaning none of the quantity is allocated to a placement

Partially Unalloacted item
Here the allocated shows '1' meaning one of the 2 items are allocated to a placement

When you select an item the placements it is allocated to are shown in the Allocation window. Here by clicking on the first item you can see that the Quantity of 2 is Allocated to the 'Default Placement'

In order to change the placements for an item you forst need to create a new placement, as follows:
To create a new placement
- Select Create Placement from the Placements drop down menu
- Enter a placement description
For larger sites you may have a site plan with unique references for each area, use the Site Reference for this if you have one.
You can also enter an additional exchange time if this particular area in the building takes longer than usual. Such as being on a top floor of a high rise. - Choose Save
To allocate an item to a new placement
-
Select the required item in the Items section
- Choose Unallocate
- If the quanity is 1 the item will be unallocated. if they quantity is greater than 1 a popup will be shown asking how many you would like to unallocate.
- Select the correct quantity and choose Unallocate
- Enter the quantity you would like to move. If the quantity is 1 it will automatically un allocate.
- Choose Unallocate.
- Select the new placement you would like to allocate to.
- Choose Allocate.
- Enter the quantity you would like to move, if the quantity is 1 it will automatically allocated