When you change an agreement's invoice date you will have pro-rata dates added to that agreement if you move the invoice date into the future. There will also be times where you add the pro-rata dates manually. In either case, the pro-rata dates will be used to calculate a charge for the period and this will be added to the invoice when the agreement is invoiced. Consider the following scenario:
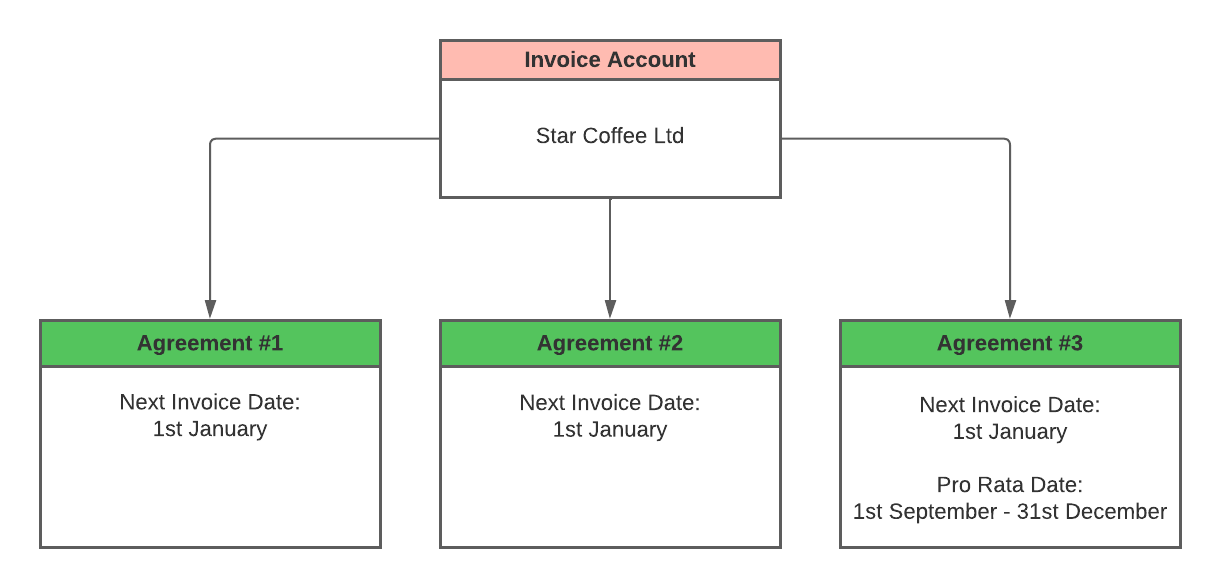
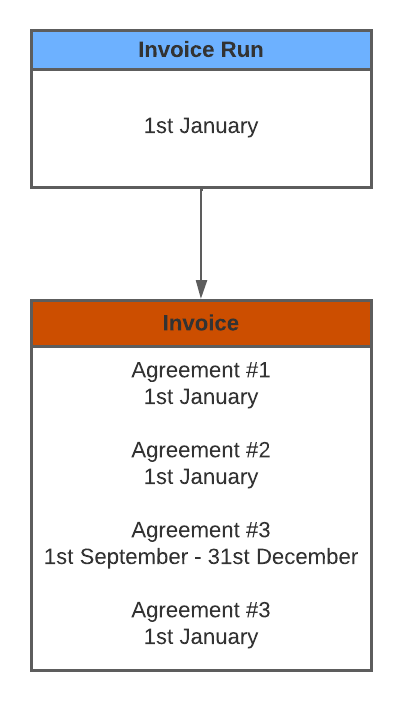
The invoice account for Star Coffee Ltd has three agreements. Agreement 3 has been aligned with the other two on this account so that they are all invoiced on the same date, because agreement 3 actually starts in September there are pro-rata dates from the 1st September until the 31st December to cover this additional period. If you just want to invoice the pro rata period at the same time as the agreement you don't need to do anything special, when you invoice the Star Coffee Ltd account on the 1st January the pro-rata period will be added to the invoice in addition to the standard agreement like so:
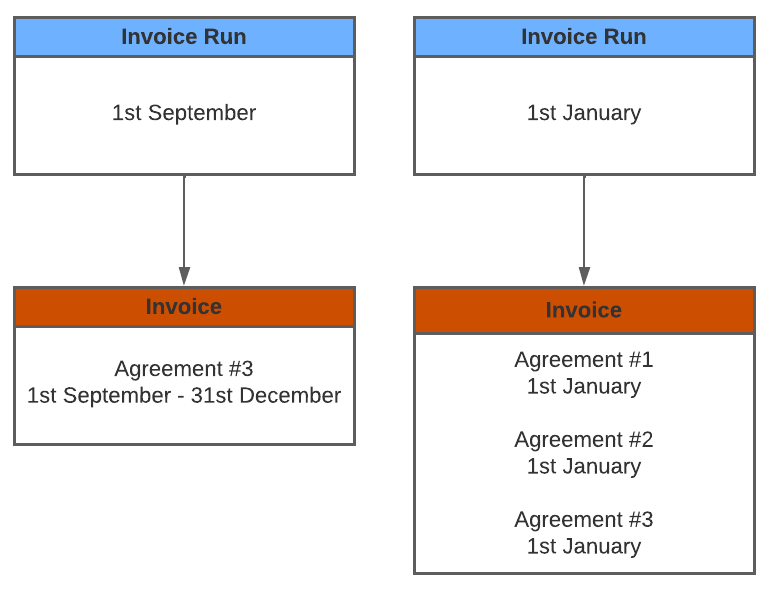
However, if you wanted to bill Star Coffee Ltd separately for the pro rata period before the 1st January you would be able to do so on the 1st September by creating a "Pro-Rata Only" invoice. The ability to invoice the pro rata periods separately will be especially useful for agreements with larger invoice periods such as Quarterly or Yearly. In this scenario, your invoices would look like below with a completely separate invoice just for the pro rata period:
Note
When the pro-rata only option is ticked on the To Create tab, either the Pro-Rata From or Pro-Rata To date (Depending on whether the agreement is invoiced in advance or not) will be used to determine if the agreement is due for invoicing and therefore appears on the To Create tab.
To create Pro-Rata only invoices
- From the home page, choose Invoices.
- Choose the Invoice Run tab.
- Choose New
- Select the invoice date you would like stamped on all of the invoices
- Select a future date you would like to inoivce up to. As in the example above you would maybe selected the end of September.
- Click the Create button
- Any agreements that are due to be invoiced are shown under the To Create tab.
- On the toolbar within the To Create tab, tick the Only Create Pro-Rata Invoices checkbox.
- You will now only see agreements where the pro-rata dates are due for invoicing on your invoice run, use the tickboxes in the grid to select the agreements you want to invoice.
- Click the Create Selected Invoices button.
- The agreements you selected will have been invoiced and the pro-rata dates will have been removed from the agreements. The Next Invoice Date, Service From and Service To dates will remain unchanged as you have only invoiced the pro-rata period of the agreement.
See Also